- Flooring
How to Prepare Your Home for Flooring Installation (A Madison Homeowner Checklist)
March 10, 2026

Getting your home ready for flooring installation is mostly about three things: clear space, safe access, and stable indoor conditions. If you handle those well, installation day goes faster, the finish looks cleaner, and you avoid the last-minute surprises that can delay a project. In Madison and nearby communities like Middleton, Sun Prairie, Fitchburg, and Verona, we also plan for winter salt, tracked-in moisture, and big humidity swings.
Key Takeaways
- Clear the room completely and protect a wide, clutter-free path from the entry to the work area.
- Confirm details that affect fit-and-finish early: transitions, trim, doors, stairs, and floor vents.
- Plan for pets, kids, parking, and work-from-home noise before installation begins.
- Keep your home at normal living temperature and consistent humidity, especially for wood floors.
- Ask for product-specific guidance on curing time and when furniture and rugs can go back.
Why preparing your home matters (more than most people realize)
Flooring looks simple once it’s down, but installation is a precision job. A crowded room, blocked access, or rushed decisions about trim and transitions can force compromises you’ll notice every day. Good prep protects your walls, keeps dust and debris more controlled, and helps your installers focus on the details that make a premium floor feel truly finished.
It also protects your schedule. The most common delays we see are avoidable: furniture not moved, pets not secured, or a surprise subfloor issue that could’ve been flagged earlier.
Two weeks before: lock in the decisions that affect the final look
This is the part most homeowners skip, and it’s where the “custom” feeling comes from.
- Transitions and thresholds: How will the new floor meet tile, carpet, or a different height in the next room? The right transition isn’t just functional. It’s a design detail.
- Trim plan: Are you reusing baseboards, replacing them, or adding shoe/quarter round? Each option changes the look along the walls.
- Doors and clearances: Some floors add height. Make sure you’ve talked through door swing clearance and whether any doors need adjustment.
- Stairs: If stairs are part of the project, confirm nosing style, safety grip, and how the stair finish will tie into the main floor.
- Old flooring removal: Confirm what’s being removed and what stays. Layered floors can hide surprises (old adhesives, soft spots, uneven seams).
- Subfloor prep expectations: Premium results depend on a flat, stable base. Ask what “prep” includes so you’re not guessing.
If anything about your home is unusual (older home quirks, radiant heat, concrete slab, a finished basement, a sunroom that runs humid), bring it up now. It’s easier to plan for those conditions than to react to them mid-install.
One week before: make access simple and protect the “travel lane”
Think like a crew carrying boxes, tools, and long planks through your home.
- Clear a wide path from the main entry to the work area.
- Choose a staging spot: a garage bay, a cleared corner, or a room that won’t be touched that day.
- Parking plan: Reserve driveway space if possible. In winter, shovel and salt the walkway early so everything stays safer and drier.
- Protect nearby surfaces: Move entry rugs, fragile décor, and anything breakable along the route. If you have tight hallways, remove wall-hung items that could get bumped.
- Work-from-home plan: Install days are noisy. If you’ve got meetings, plan to work offsite or pick a quiet zone away from saw work.
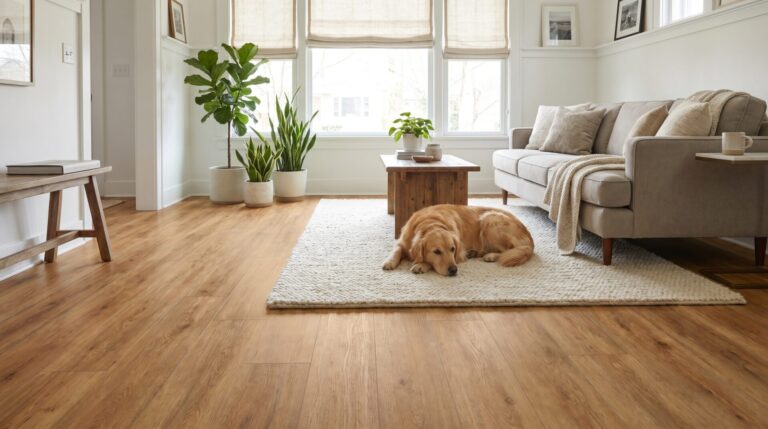
Pets and kids: plan ahead, not in the moment
Even the calmest dog can panic when strangers show up with loud tools. And open doorways are an escape route.
- Decide where pets will be during the workday (a closed room, a friend’s house, daycare, or a crate).
- If toddlers are home, consider a day out. It’s safer and much less stressful.
- If you have cats, confirm a secure room with food, water, and a litter box, and make sure installers won’t need to access that room.
Three days before: clear the room the right way
This is where most homeowners underestimate the time.
Remove everything from the floor area:
- Furniture (including ottomans, floor lamps, plant stands)
- Rugs and mats
- Toys, pet bowls, and bins
- Small décor and anything on low shelves that might shake loose
Also handle the “above floor” items people forget:
- Curtains that touch the floor
- Fragile items on nearby shelves
- Wall décor in hallways or stairways that could be bumped
- Electronics and cords (especially around TV stands)
If you’re not sure what you’re responsible for moving, don’t guess. Ask. The goal is a clear room with zero obstacles so the installation can move efficiently and safely.
The day before: set your home up for a clean start
A little planning the night before makes install day smoother.
- Vacuum or sweep the area you’re clearing out. Less grit means less mess being tracked around.
- Make outlets accessible. Installers need power, and it helps if cords aren’t tangled behind furniture.
- Plan bathroom access if the project impacts a hallway or a bathroom floor.
- Decide on a “no shoes” or “work shoes only” policy for your household and stick to it.
Wisconsin tip: In winter, keep a boot tray and a towel at the entry. Snowmelt and salt turn into gritty moisture fast, and you don’t want it migrating into the work zone.
Installation day: what to expect (and what helps most)
Most installs follow a rhythm: protect the space, demo or prep, install, then cleanup and a quick walkthrough.
Here’s how you can help things go smoothly:
- Keep the travel lane clear all day.
- Keep pets and kids secured.
- Be available for quick questions. Little decisions pop up in real time (transition direction, trim return points, stair details).
- Don’t plan a “drop in” from multiple family members. Too many people in the space slows things down and increases risk of damage.
Dust and noise are part of construction, even with careful practices. If you have allergies or sensitivities, mention it ahead of time so we can talk through ventilation and product choices that fit your needs.
Material-specific prep notes (because not all floors behave the same)
Different flooring types have different priorities. Here’s what matters most.
Hardwood and engineered wood
- Consistent indoor conditions matter. Wood moves with humidity.
- Plan for acclimation as recommended for your specific product and site conditions.
- Keep heat running in winter. Big temperature swings can create avoidable gaps later.
Vinyl and laminate
- These floors want a flat subfloor. “Looks fine” and “meets tolerance” are not always the same thing.
- Clear decisions on transitions and door clearance still matter, especially with thicker rigid-core products.
- Keep grit under control. Grit is what makes floors look worn early.
Tile
- Tile work often involves more cure time. Plan your room usage accordingly.
- If a bathroom is involved, plan how you’ll handle that space during the project.
- Grout and mortar need time to set properly, so follow the guidance you’re given before putting weight back on the floor.
Carpet
- Clear the room fully, including closets if they’re part of the scope.
- Plan for pets and kids because doors may be open and the space will be in motion.
- If you’re sensitive to odors, talk through options and timing ahead of install day.
After installation: protect the investment in the first week
The first week is when small choices make a big difference long term.
- Wait to move heavy furniture back until you’re told it’s safe for your specific installation.
- Use felt pads on furniture legs before anything touches the new floor.
- Avoid dragging furniture, even “just a few inches.”
- Hold off on rugs until you’ve confirmed the timing is right for your product and any adhesives or finishes.
- Keep entry mats working hard, especially in Madison winters. Salt and grit are a floor’s worst enemy.
Quick checklist: your pre-install “done” list
- Confirm transitions, trim plan, door clearance, and stairs (if applicable)
- Confirm who moves what (furniture, appliances, toilets, electronics)
- Clear the room completely, including rugs and floor décor
- Create a clear path from entry to work area
- Secure pets and plan kid safety
- Keep indoor temperature and humidity steady
- Set aside a staging area for boxes and tools
- Plan for dust, noise, and temporary room closures
- Ask for care instructions and return-to-use timing
FAQ: Preparing for Flooring Installation
How long does it take to prepare a room?
For most rooms, clearing furniture and small items takes longer than people expect. Start early, and plan extra time for bookshelves, electronics, and fragile décor.
Do we need to leave the house during installation?
Not always, but it can be more comfortable. If you work from home, have pets, or the project is in a main living area, spending the day out can reduce stress.
Should we turn off heat or AC to reduce dust?
In most cases, keeping your home at normal living conditions is better for the flooring and the install. If you have concerns about dust, ask about practical steps like vent protection and filter changes.
What if we find a subfloor issue when we start moving furniture?
That’s exactly the kind of thing we want to know early. Soft spots, squeaks, or uneven areas are easier to address when they’re identified before installation begins.
Can we use the room right away after installation?
It depends on the flooring type and the installation method. Some floors are ready for light traffic sooner than others. Follow the specific guidance you’re given for your project.
What’s the biggest mistake homeowners make before install day?
Waiting until the last minute to clear the room and assuming details like transitions and trim will “work themselves out.” The best results come from planning those finish details up front.
Closing: a smoother install starts with smart prep
When your home is prepped well, installation is faster, cleaner, and the finished floor looks the way it should: intentional, tight, and built to last. That’s how we protect the craftsmanship and keep the process straightforward, Covering Every Detail.
If you’d like a prep checklist tailored to your specific flooring and rooms, contact Harmony Flooring and we’ll walk you through it: https://www.harmonyflooring.com/contact/
You Might Also Like
-

- Flooring
June 5, 2026
7 Flooring Myths Madison Homeowners Still Believe
-
- Flooring
June 4, 2026
Pet-Friendly Flooring for Madison Homes: What Actually Works
-

- Flooring
March 26, 2026
Best Carpet for Bedrooms: How to Choose the Right Style, Fiber, and Cushion